
Damp walls can be a significant issue in homes, leading to structural damage, health problems, and an uncomfortable living environment.
Treating damp walls internally requires a careful approach to identifying the source of the moisture, choosing the appropriate treatment method, and implementing preventive measures to ensure long-term protection.
Here’s a step-by-step guide on how to effectively treat damp walls internally.
Treating Damp Walls
Step 1: Identify the Source of Dampness
Before treating damp walls, it’s crucial to determine the source of the moisture. Common causes include:
- Rising Damp: Moisture from the ground rising through the walls.
- Penetrating Damp: Water seeping through the walls from the outside.
- Condensation: Moisture from the air condensing on cold surfaces.
Identifying the source helps in choosing the right treatment method.
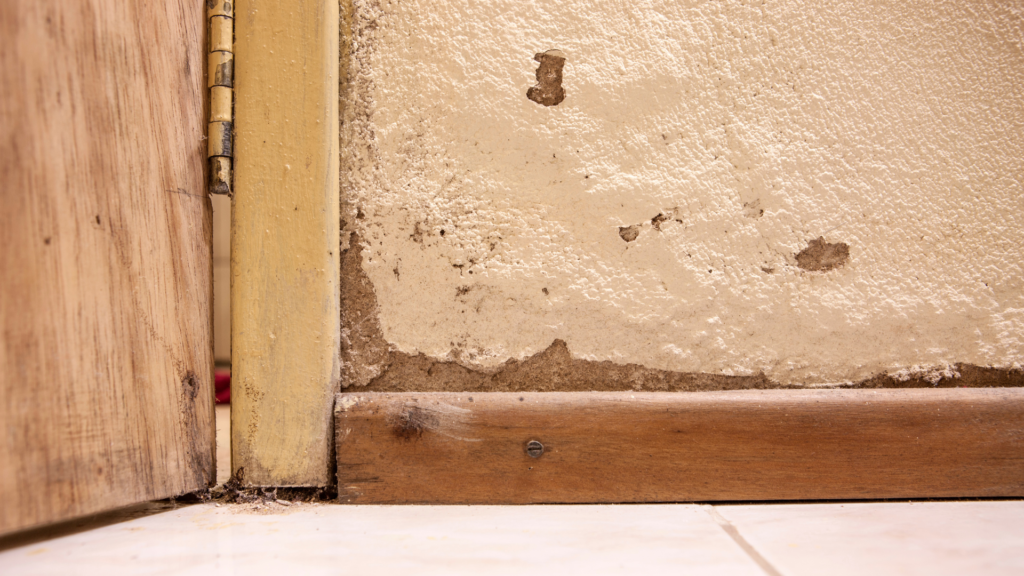
Look for signs such as tide marks, peeling paint, mould growth, and damp patches.
Step 2: Prepare the Area
- Remove Affected Plaster: Scrape off any damaged plaster or paint to expose the underlying brickwork.
- Clean the Wall: Use a fungicidal wash to clean the wall and remove mould spores and algae.
- Dry the Wall: Ensure the wall is completely dry before applying any treatment. This might require the use of dehumidifiers or heaters.
Step 3: Apply Damp-Proofing Treatments
Depending on the type of dampness, different treatments can be applied:
- For Rising Damp:
- Damp Proof Course (DPC): Install a chemical DPC by injecting a damp-proofing cream into the wall at regular intervals. This creates a barrier that prevents moisture from rising.
- Waterproof Render: Apply a waterproof render on the wall after installing the DPC. This adds an additional layer of protection.
- For Penetrating Damp:
- Seal External Walls: Ensure that all external defects such as cracks and gaps are sealed to prevent water ingress.
- Internal Waterproofing: Apply a waterproof membrane or slurry to the internal walls. These products are designed to block moisture from penetrating the wall surface.
- For Condensation:
- Improve Ventilation: Install extractor fans in areas prone to condensation such as bathrooms and kitchens. Ensure that windows and vents are properly used to increase airflow.
- Thermal Insulation: Add thermal insulation boards to cold walls to reduce the temperature difference and prevent condensation.
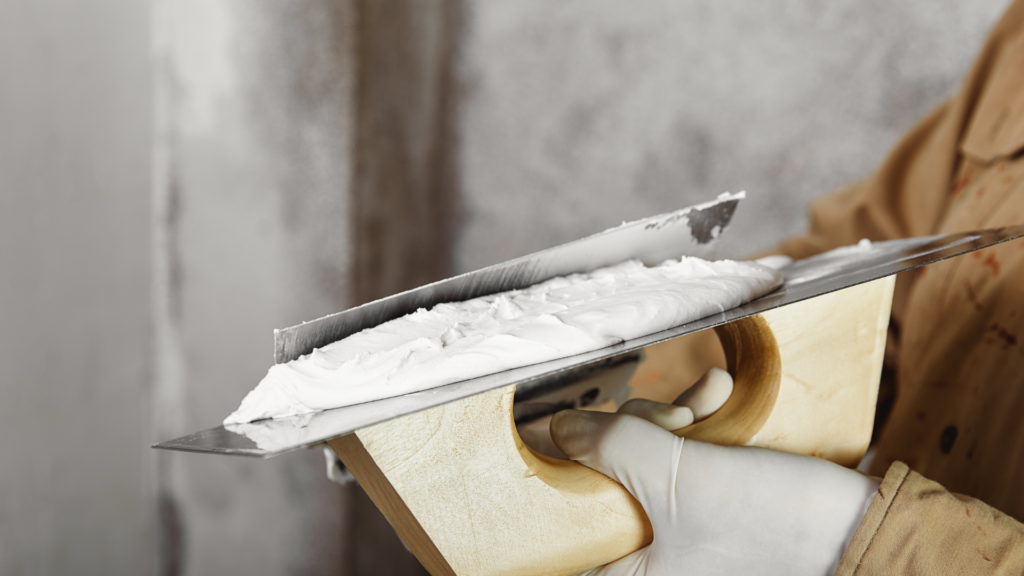
Step 4: Repair and Redecorate
- Replastering: After treating the damp and ensuring the wall is dry, replaster the affected area using a salt-resistant plaster. This helps to prevent any residual salts from causing further issues.
- Redecoration: Once the plaster is dry, redecorate the wall with moisture-resistant paint or wallpaper to enhance protection and improve aesthetics.
Step 5: Prevent Future Damp Issues
- Regular Maintenance: Regularly inspect your property for signs of damp and address any issues promptly.
- Gutter and Drain Maintenance: Ensure that gutters and downpipes are clear and functioning correctly to prevent water from seeping into the walls.
- Adequate Heating and Ventilation: Maintain a consistent indoor temperature and ensure proper ventilation to reduce the risk of condensation.
Final Thoughts
Treating damp walls internally involves identifying the source of moisture, applying the appropriate treatment, and implementing preventive measures to protect your home.
By following these steps, you can effectively manage and prevent damp issues, ensuring a healthy and comfortable living environment.
For more detailed information and professional advice, consider a consulting damp proofing specialist such as Chichester Damp Proofing who can provide tailored solutions based on your specific needs.